记录下用idea新建Spring项目
0x01 环境配置
0x02 简单的hello world
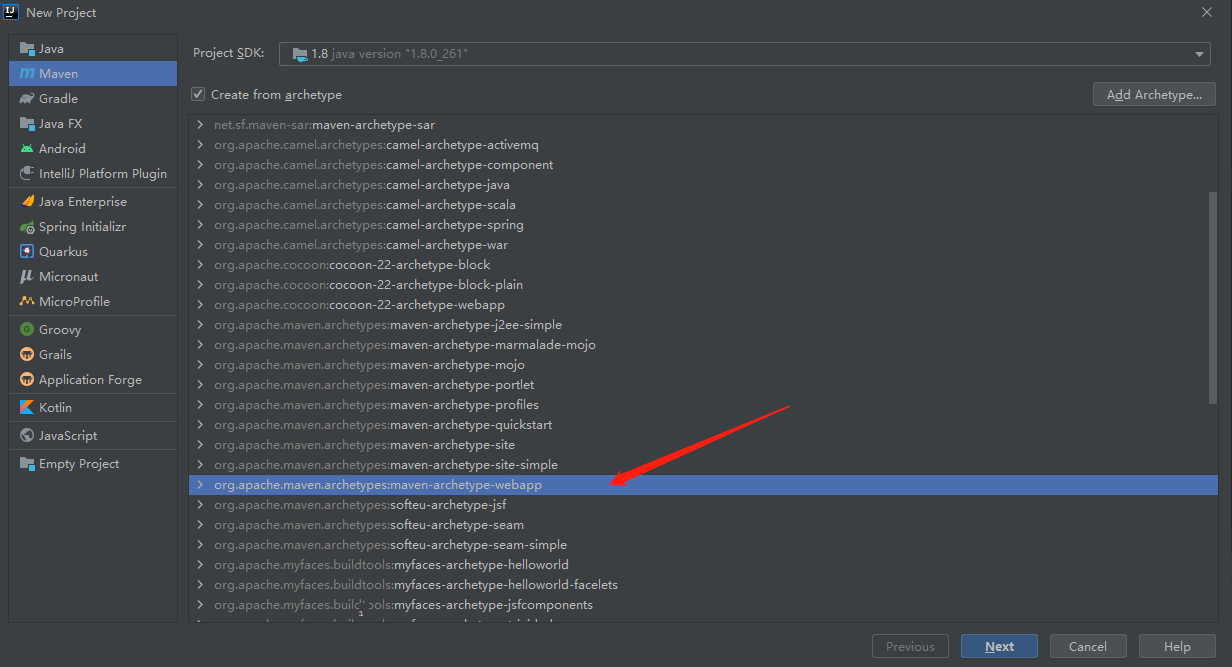
新建一个项目
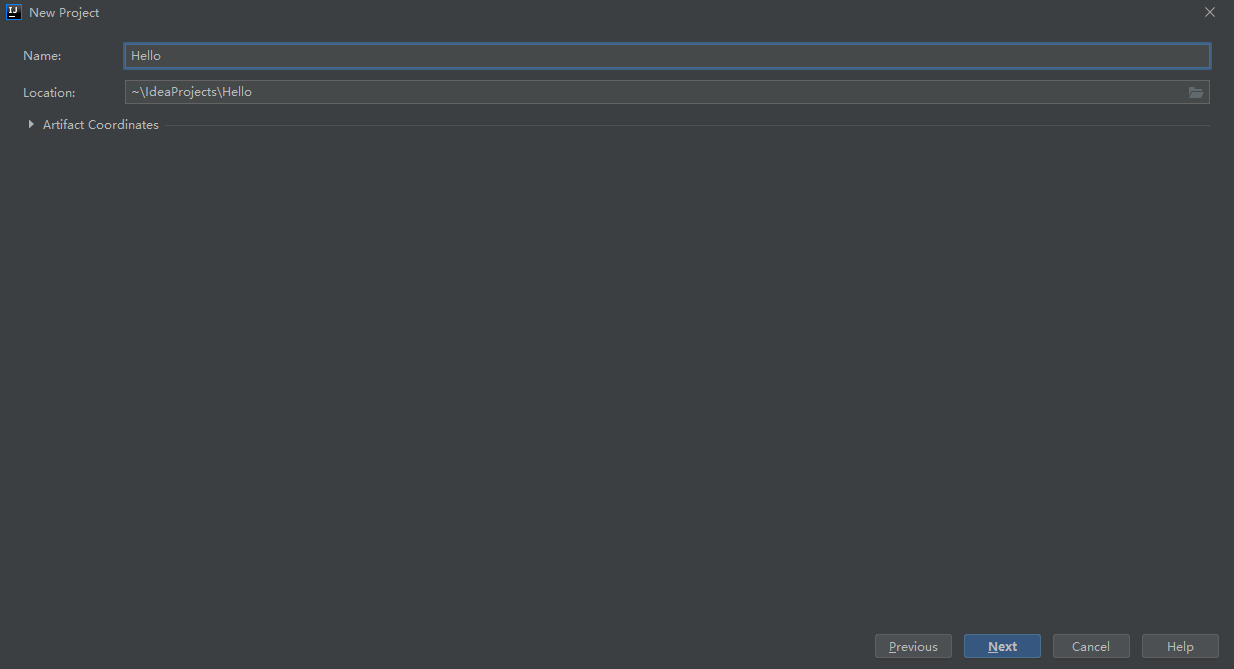
给项目命名
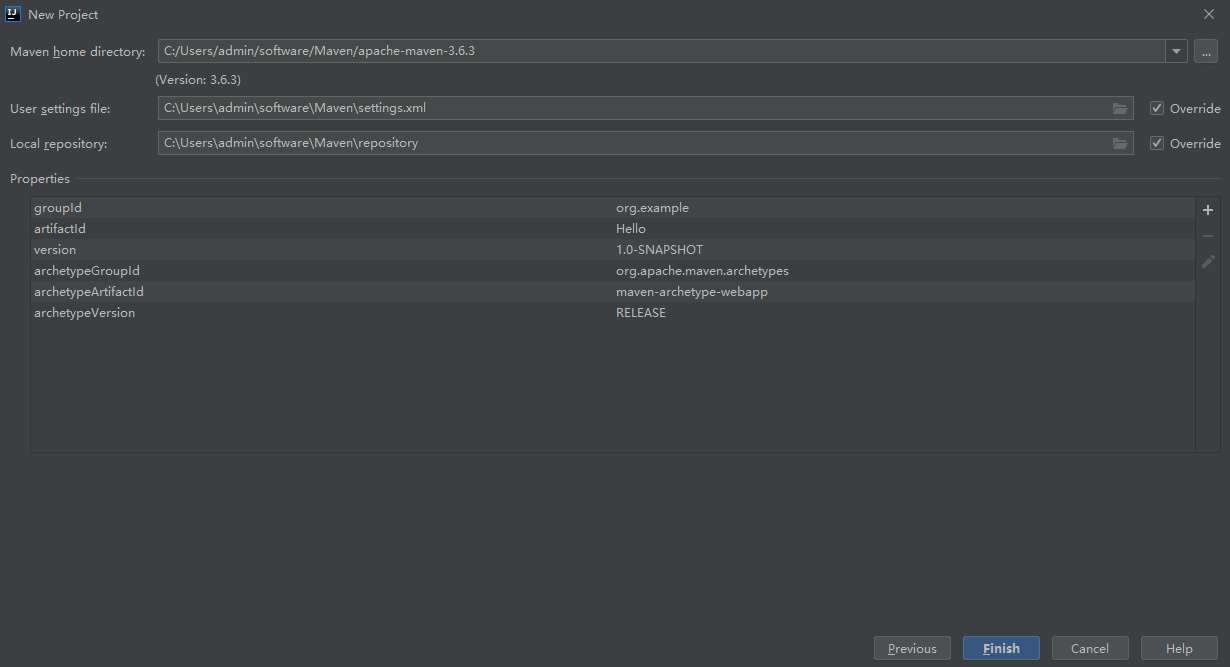
选择maven,这里settings.xml必须要和repository在同一个目录,否则会出错,setting.xml可以添加阿里云的仓库
1
2
3
4
5
6
7
8
9
10
11
12
13
14
15
16
17
18
19
20
21
22
23
24
25
26
27
28
29
30
31
32
33
34
35
36
37
38
39
40
41
42
43
44
45
46
47
48
49
50
51
52
53
54
55
56
57
58
59
60
61
62
63
64
65
| <?xml version="1.0" encoding="UTF-8"?>
<settings xmlns="http://maven.apache.org/SETTINGS/1.0.0"
xmlns:xsi="http://www.w3.org/2001/XMLSchema-instance"
xsi:schemaLocation="http://maven.apache.org/SETTINGS/1.0.0 http://maven.apache.org/xsd/settings-1.0.0.xsd">
<pluginGroups />
<proxies />
<servers />
<localRepository>C:\Users\admin\software\Maven\repository</localRepository>
<mirrors>
<mirror>
<id>alimaven</id>
<mirrorOf>central</mirrorOf>
<name>aliyun maven</name>
<url>http://maven.aliyun.com/nexus/content/repositories/central/</url>
</mirror>
<mirror>
<id>alimaven</id>
<name>aliyun maven</name>
<url>http://maven.aliyun.com/nexus/content/groups/public/</url>
<mirrorOf>central</mirrorOf>
</mirror>
<mirror>
<id>central</id>
<name>Maven Repository Switchboard</name>
<url>http://repo1.maven.org/maven2/</url>
<mirrorOf>central</mirrorOf>
</mirror>
<mirror>
<id>repo2</id>
<mirrorOf>central</mirrorOf>
<name>Human Readable Name for this Mirror.</name>
<url>http://repo2.maven.org/maven2/</url>
</mirror>
<mirror>
<id>ibiblio</id>
<mirrorOf>central</mirrorOf>
<name>Human Readable Name for this Mirror.</name>
<url>http://mirrors.ibiblio.org/pub/mirrors/maven2/</url>
</mirror>
<mirror>
<id>jboss-public-repository-group</id>
<mirrorOf>central</mirrorOf>
<name>JBoss Public Repository Group</name>
<url>http://repository.jboss.org/nexus/content/groups/public</url>
</mirror>
<mirror>
<id>google-maven-central</id>
<name>Google Maven Central</name>
<url>https://maven-central.storage.googleapis.com
</url>
<mirrorOf>central</mirrorOf>
</mirror>
<mirror>
<id>maven.net.cn</id>
<name>oneof the central mirrors in china</name>
<url>http://maven.net.cn/content/groups/public/</url>
<mirrorOf>central</mirrorOf>
</mirror>
</mirrors>
</settings>
|
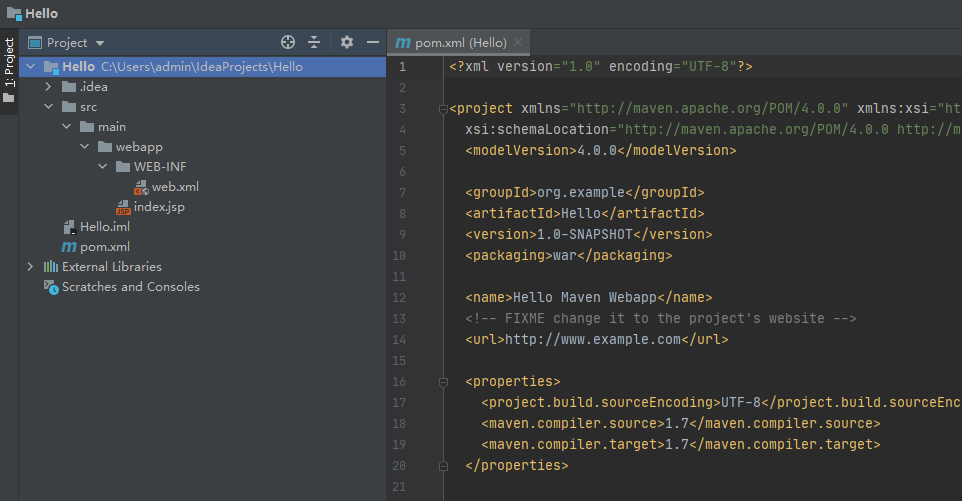
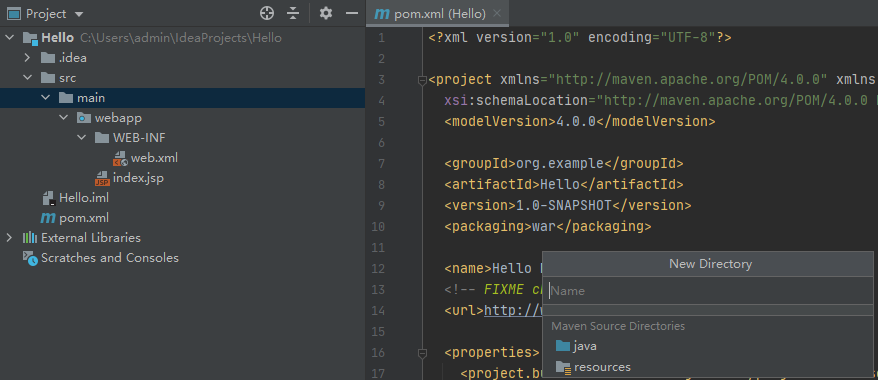
新建完项目的目录结构是这样的
然后添加java和resources文件夹
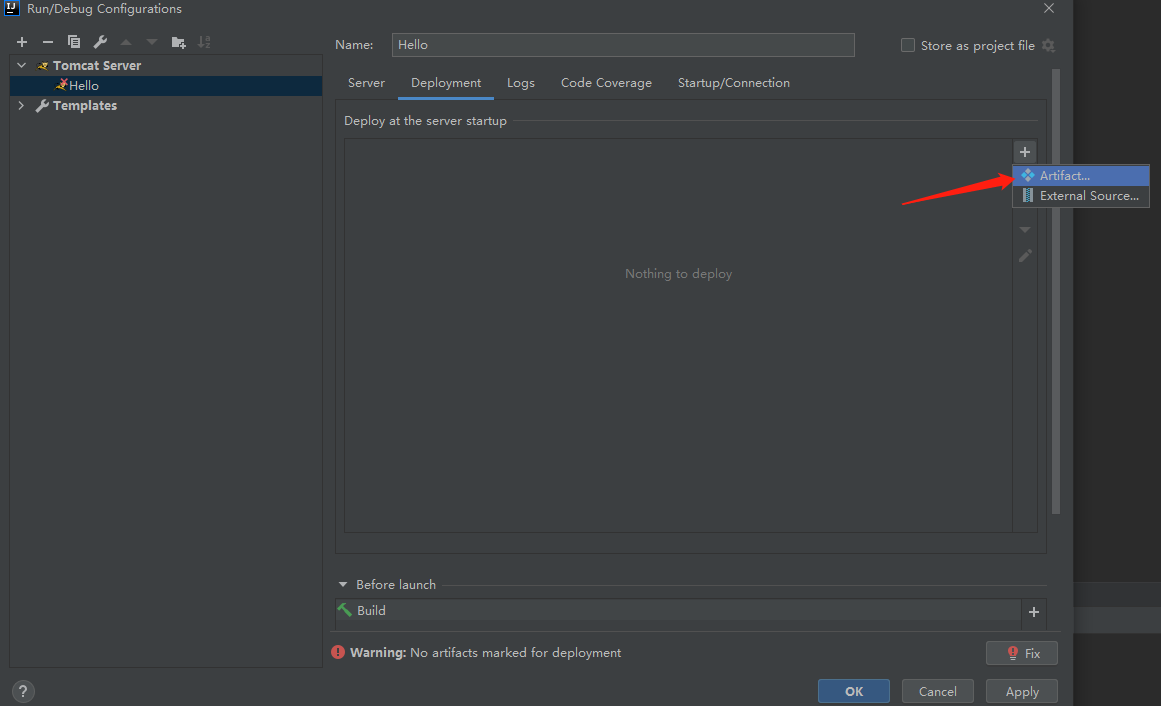
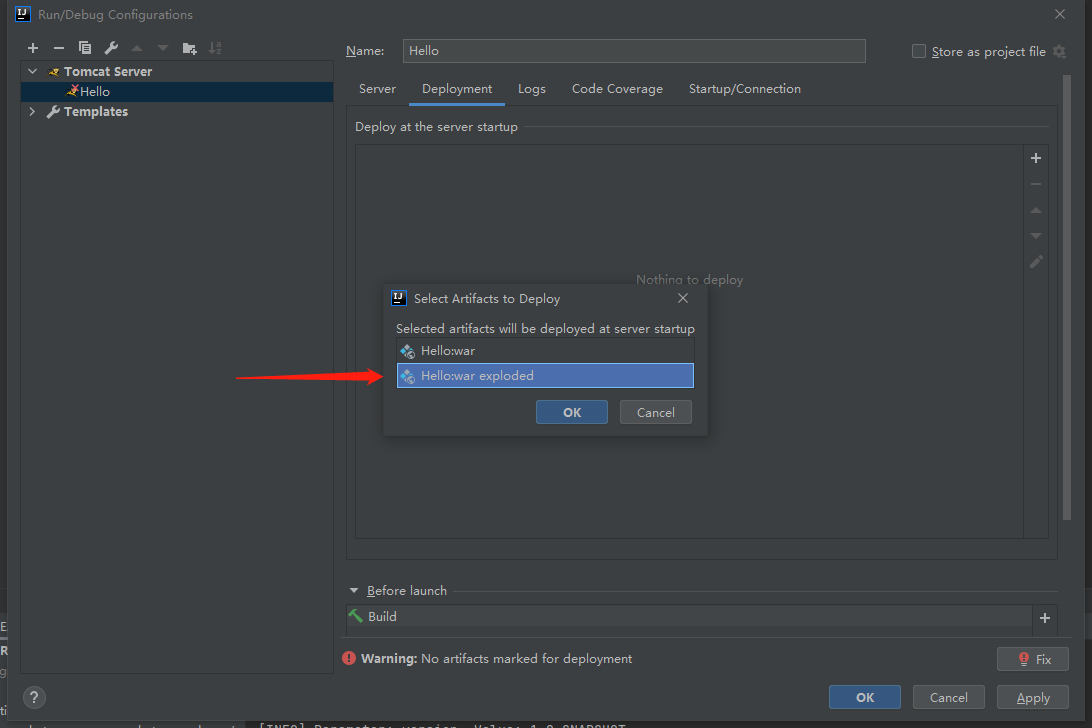
配置Tomcat,
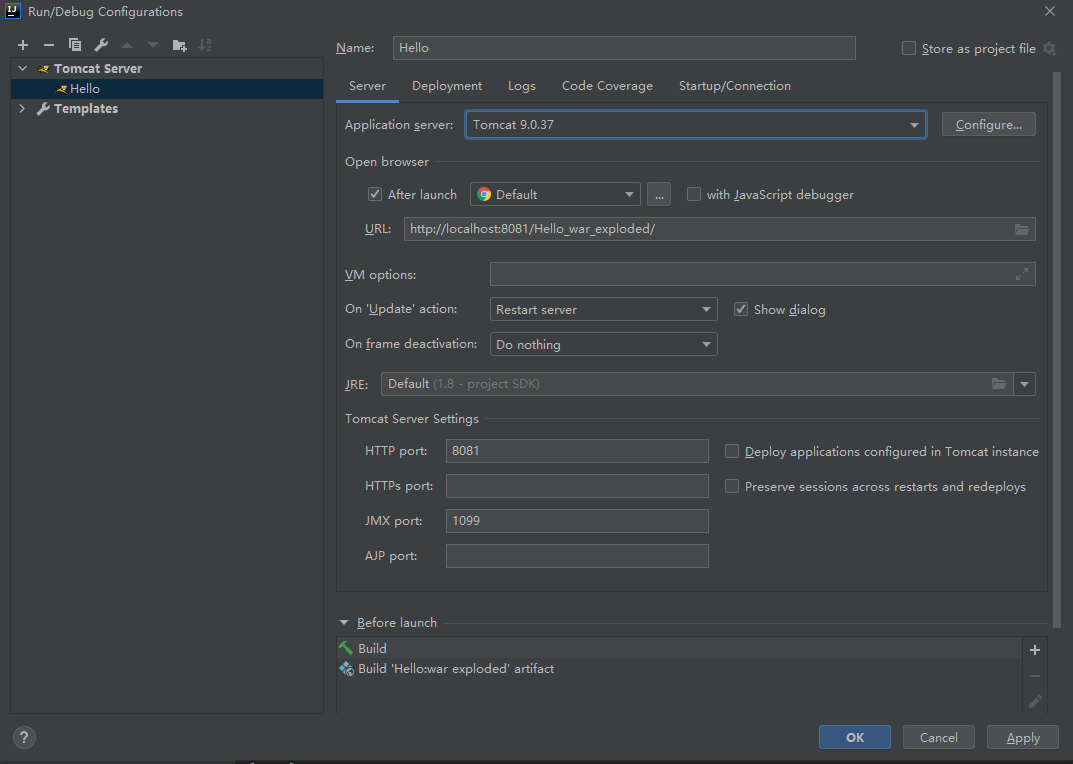
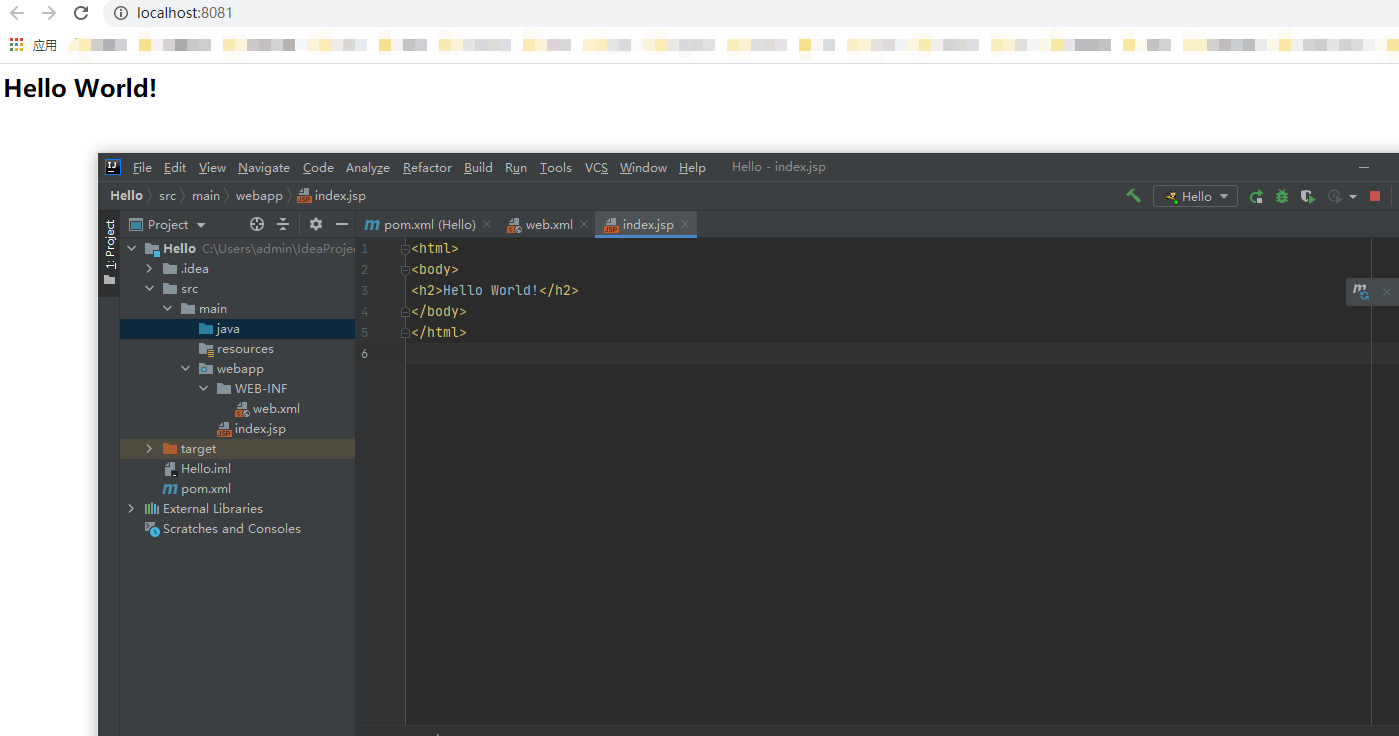
点击运行。

可以修改应用上下文为/
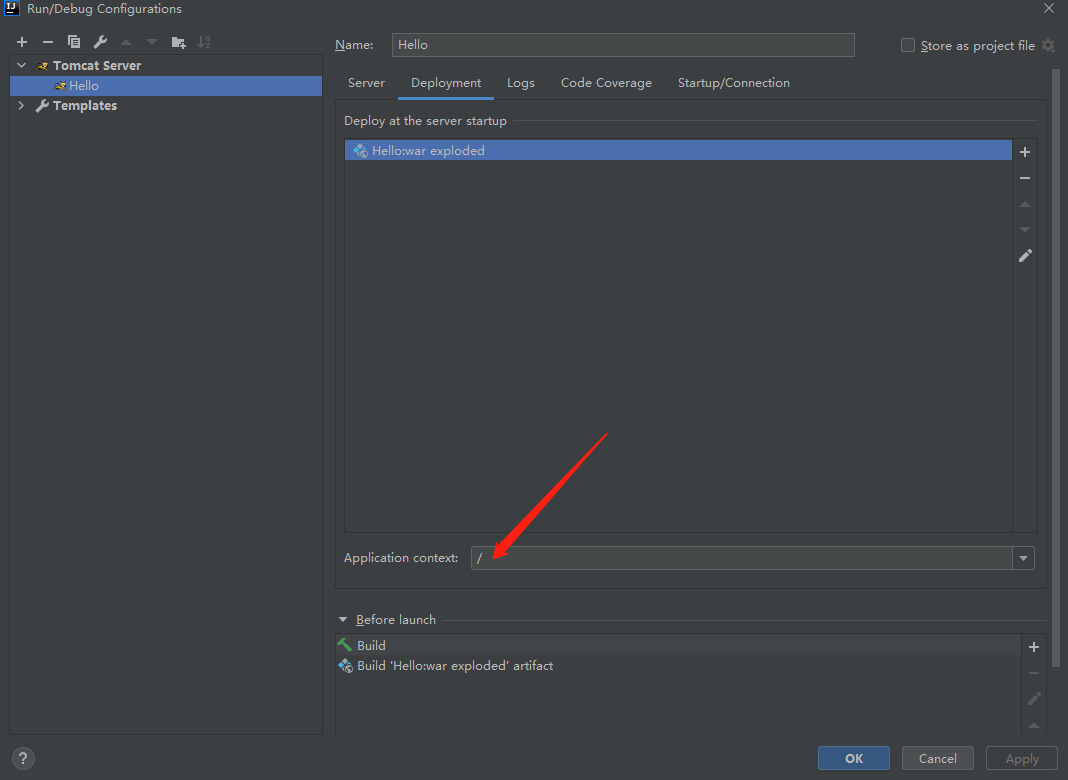
即可以在htp://localhost:8081访问到hello world
0x03 导入Spring MVC
编辑pom.xml,添加spring
1
2
3
4
5
6
7
8
9
10
11
12
13
14
15
16
17
18
19
20
21
22
23
24
25
26
27
28
29
30
31
32
33
34
35
36
37
38
39
40
41
42
43
44
45
46
47
48
49
50
51
52
53
54
55
56
57
58
59
60
|
<dependency>
<groupId>org.springframework</groupId>
<artifactId>spring-beans</artifactId>
<version>5.1.17.RELEASE</version>
</dependency>
<dependency>
<groupId>org.springframework</groupId>
<artifactId>spring-context</artifactId>
<version>5.1.17.RELEASE</version>
</dependency>
<dependency>
<groupId>org.springframework</groupId>
<artifactId>spring-context-support</artifactId>
<version>5.1.17.RELEASE</version>
</dependency>
<dependency>
<groupId>org.springframework</groupId>
<artifactId>spring-core</artifactId>
<version>5.1.17.RELEASE</version>
</dependency>
<dependency>
<groupId>org.springframework</groupId>
<artifactId>spring-expression</artifactId>
<version>5.1.17.RELEASE</version>
</dependency>
<dependency>
<groupId>org.springframework</groupId>
<artifactId>spring-aop</artifactId>
<version>5.1.17.RELEASE</version>
</dependency>
<dependency>
<groupId>org.springframework</groupId>
<artifactId>spring-aspects</artifactId>
<version>5.1.17.RELEASE</version>
</dependency>
<dependency>
<groupId>org.springframework</groupId>
<artifactId>spring-web</artifactId>
<version>5.1.17.RELEASE</version>
</dependency>
<dependency>
<groupId>org.springframework</groupId>
<artifactId>spring-webmvc</artifactId>
<version>5.1.17.RELEASE</version>
</dependency>
<dependency>
<groupId>javax.servlet</groupId>
<artifactId>jstl</artifactId>
<version>1.2</version>
</dependency>
|
在<dependencies>标签中添加上面的依赖,在选择包的时候可以利用https://mvnrepository.com/这个网站搜索复制指定版本的pom.xml文件内容。
添加框架支持,默认的web.xml是
1
2
3
4
5
6
7
| <!DOCTYPE web-app PUBLIC
"-//Sun Microsystems, Inc.//DTD Web Application 2.3//EN"
"http://java.sun.com/dtd/web-app_2_3.dtd" >
<web-app>
<display-name>Archetype Created Web Application</display-name>
</web-app>
|
当Add Frameworks Support之后,这里选择5.1.17.RELEASE版本的spring(如果没有Spring,在Project Structure中将Spring去掉就可以了)
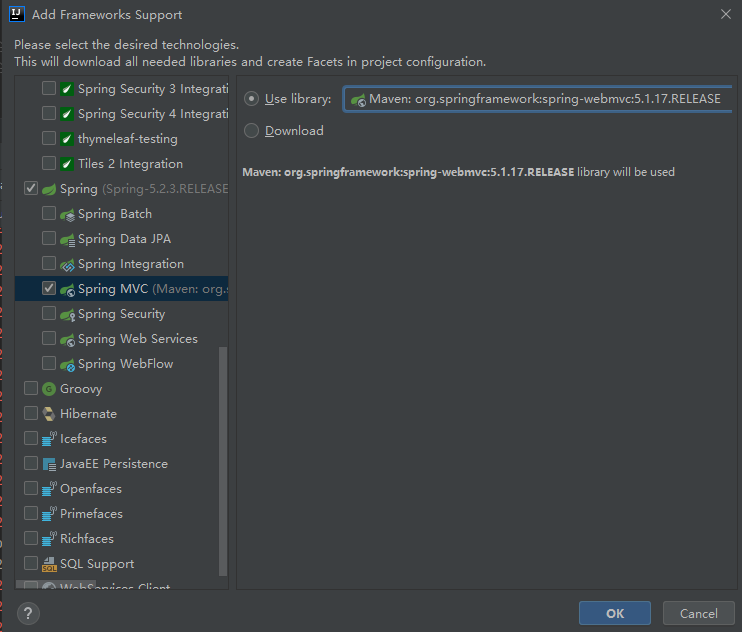
会新生成applicationContext.xml、springMVC-servlet.xml两个文件。(不同的spring版本生成的servlet配置文件名不一定相同)
0x04 配置 springMVC 之 xml 配置
默认生成的两个xml文件如下:
applicationContext.xml
1
2
3
4
5
6
| <?xml version="1.0" encoding="UTF-8"?>
<beans xmlns="http://www.springframework.org/schema/beans"
xmlns:xsi="http://www.w3.org/2001/XMLSchema-instance"
xsi:schemaLocation="http://www.springframework.org/schema/beans http://www.springframework.org/schema/beans/spring-beans.xsd">
</beans>
|
springMVC-servlet.xml
1
2
3
4
5
6
| <?xml version="1.0" encoding="UTF-8"?>
<beans xmlns="http://www.springframework.org/schema/beans"
xmlns:xsi="http://www.w3.org/2001/XMLSchema-instance"
xsi:schemaLocation="http://www.springframework.org/schema/beans http://www.springframework.org/schema/beans/spring-beans.xsd">
</beans>
|
在web.xml中加入下面的标签配置springMVC-servlet.xml作为mvc的配置文件
1
2
3
4
5
6
7
8
9
10
11
12
13
14
15
16
17
18
19
20
21
22
23
24
25
26
27
28
29
30
31
32
33
34
35
36
37
| <?xml version="1.0" encoding="UTF-8"?>
<web-app xmlns="http://xmlns.jcp.org/xml/ns/javaee"
xmlns:xsi="http://www.w3.org/2001/XMLSchema-instance"
xsi:schemaLocation="http://xmlns.jcp.org/xml/ns/javaee http://xmlns.jcp.org/xml/ns/javaee/web-app_3_1.xsd"
version="3.1">
<display-name>Archetype Created Web Application</display-name>
<context-param>
<param-name>contextConfigLocation</param-name>
<param-value>/WEB-INF/applicationContext.xml</param-value>
</context-param>
<listener>
<listener-class>org.springframework.web.context.ContextLoaderListener</listener-class>
</listener>
<welcome-file-list>
<welcome-file>index.jsp</welcome-file>
</welcome-file-list>
<servlet>
<servlet-name>springMVC</servlet-name>
<servlet-class>org.springframework.web.servlet.DispatcherServlet</servlet-class>
<init-param>
<param-name>contextConfigLocation</param-name>
<param-value>/WEB-INF/springMVC-servlet.xml</param-value>
</init-param>
<load-on-startup>1</load-on-startup>
<async-supported>true</async-supported>
</servlet>
<servlet-mapping>
<servlet-name>springMVC</servlet-name>
<url-pattern>/</url-pattern>
</servlet-mapping>
</web-app>
|
编辑springMVC-servlet.xml
1
2
3
4
5
6
7
8
9
10
11
12
13
14
15
16
17
18
19
20
21
22
23
24
25
26
27
28
| <?xml version="1.0" encoding="UTF-8"?>
<beans xmlns="http://www.springframework.org/schema/beans"
xmlns:xsi="http://www.w3.org/2001/XMLSchema-instance"
xmlns:context="http://www.springframework.org/schema/context"
xmlns:mvc="http://www.springframework.org/schema/mvc"
xsi:schemaLocation="http://www.springframework.org/schema/beans
http://www.springframework.org/schema/beans/spring-beans.xsd
http://www.springframework.org/schema/context
http://www.springframework.org/schema/context/spring-context.xsd
http://www.springframework.org/schema/mvc
http://www.springframework.org/schema/mvc/spring-mvc-3.0.xsd">
<context:component-scan base-package="com.mount4in"/>
<mvc:annotation-driven/>
<mvc:default-servlet-handler/>
<bean class="org.springframework.web.servlet.view.InternalResourceViewResolver">
<property name="viewClass" value="org.springframework.web.servlet.view.JstlView"/>
<property name="prefix" value="/WEB-INF/views/"/>
<property name="suffix" value=".jsp"/>
</bean>
</beans>
|
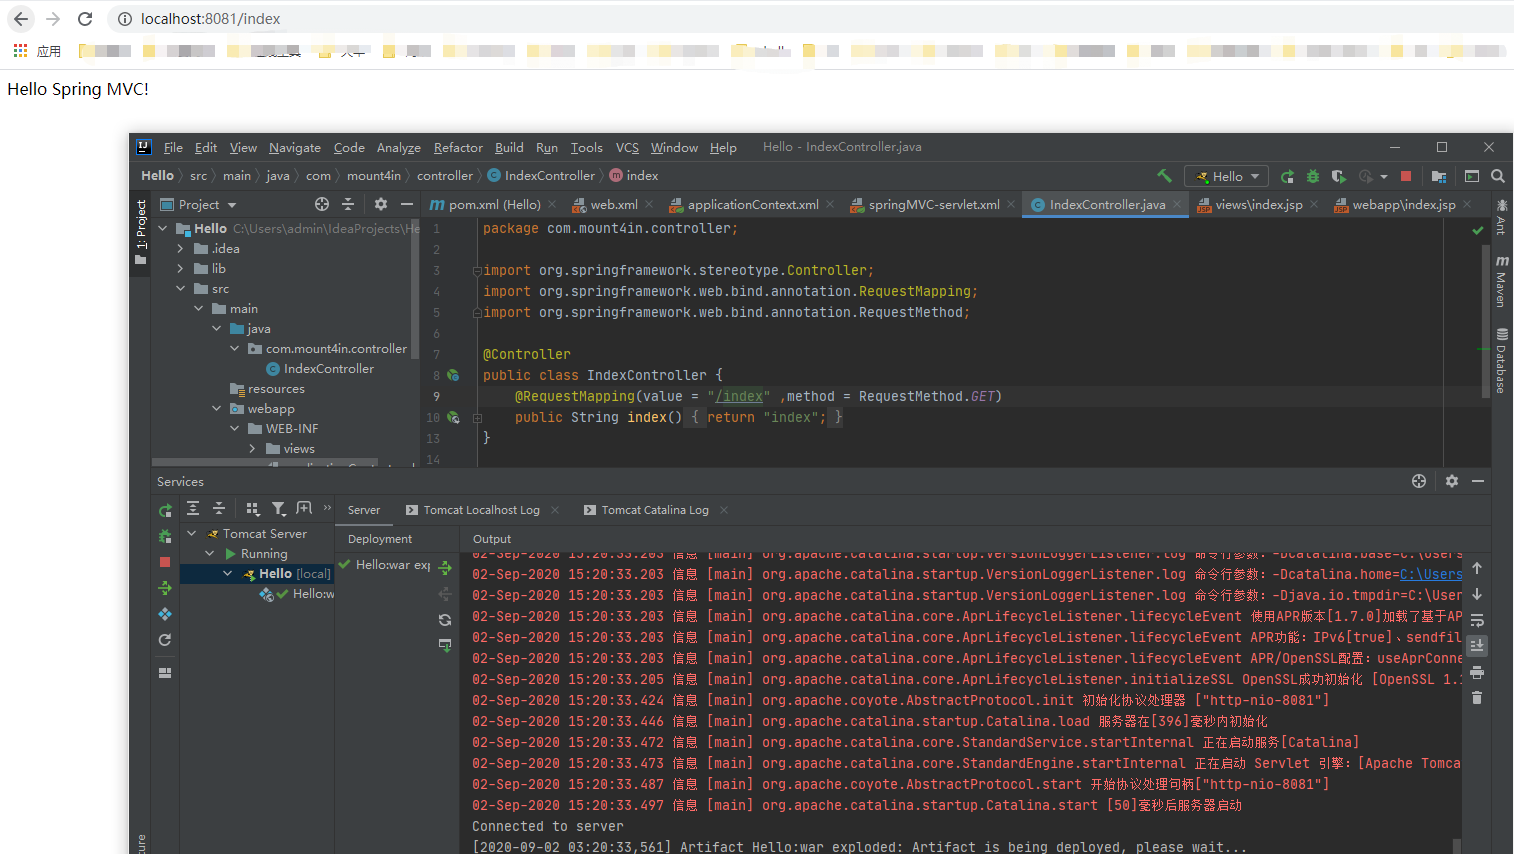
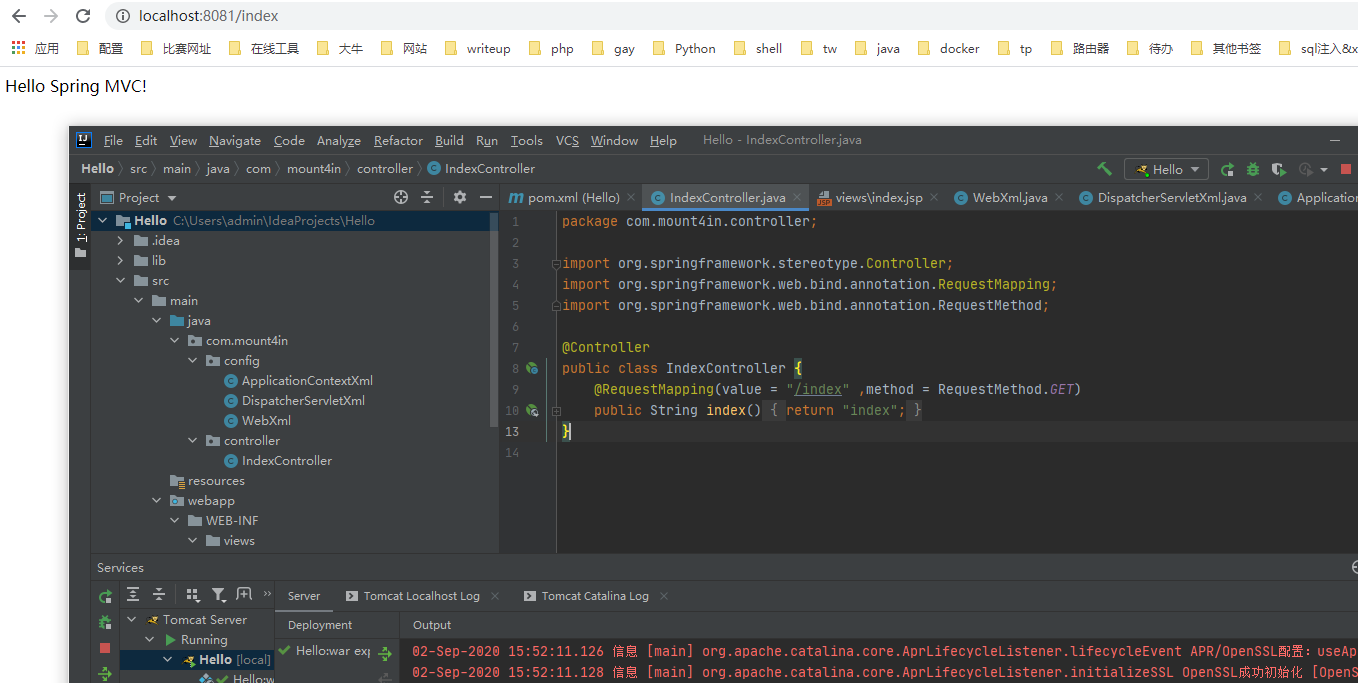
在java文件夹新建package:com.mount4in.controller,之后新建IndexController.java文件,如下所示:
运行程序:
0x05 配置springMVC之Java配置
新建com.mounti4n.config包,新建WebXml、ApplicationContextXml和DispatcherServletXml类分别代替web.xml、application-context.xml和dispather-servlet.xml,
1
2
3
4
5
6
7
8
9
10
11
12
13
14
15
16
17
18
19
20
21
22
23
24
25
26
27
28
29
30
31
32
33
34
35
36
37
38
39
40
41
|
package com.mount4in.config;
import org.springframework.web.servlet.support.AbstractAnnotationConfigDispatcherServletInitializer;
public class WebXml extends AbstractAnnotationConfigDispatcherServletInitializer{
@Override
protected Class<?>[] getRootConfigClasses() {
return new Class<?>[] {ApplicationContextXml.class};
}
@Override
protected Class<?>[] getServletConfigClasses() {
return new Class<?>[] {DispatcherServletXml.class};
}
@Override
protected String[] getServletMappings() {
return new String[] {"/"};
}
}
|
1
2
3
4
5
6
7
8
9
10
11
12
13
14
15
16
17
18
19
|
package com.mount4in.config;
import org.springframework.context.annotation.ComponentScan;
import org.springframework.context.annotation.Configuration;
import org.springframework.context.annotation.FilterType;
import org.springframework.web.servlet.config.annotation.EnableWebMvc;
@Configuration
@ComponentScan(basePackages = {"com.mount4in"},
excludeFilters = {
@ComponentScan.Filter(type = FilterType.ANNOTATION, value = EnableWebMvc.class)
})
public class ApplicationContextXml {
}
|
1
2
3
4
5
6
7
8
9
10
11
12
13
14
15
16
17
18
19
20
21
22
23
24
25
26
27
28
29
30
31
32
33
34
35
36
37
38
39
40
41
42
43
44
45
46
47
48
49
50
51
52
53
54
55
56
|
package com.mount4in.config;
import org.springframework.context.annotation.Bean;
import org.springframework.context.annotation.ComponentScan;
import org.springframework.context.annotation.Configuration;
import org.springframework.web.servlet.ViewResolver;
import org.springframework.web.servlet.config.annotation.*;
import org.springframework.web.servlet.view.InternalResourceViewResolver;
@Configuration
@EnableWebMvc
@ComponentScan("com.mount4in.controller")
public class DispatcherServletXml implements WebMvcConfigurer {
@Bean
public ViewResolver viewResolver() {
InternalResourceViewResolver resolver = new InternalResourceViewResolver();
resolver.setViewClass(org.springframework.web.servlet.view.JstlView.class);
resolver.setPrefix("/WEB-INF/views/");
resolver.setSuffix(".jsp");
resolver.setExposeContextBeansAsAttributes(true);
return resolver;
}
@Override
public void configureDefaultServletHandling(DefaultServletHandlerConfigurer configurer) {
configurer.enable();
}
@Override
public void addResourceHandlers(ResourceHandlerRegistry registry) {
registry.addResourceHandler("/css/**").addResourceLocations("/WEB-INF/views/css/");
registry.addResourceHandler("/js/**").addResourceLocations("/WEB-INF/views/js/");
registry.addResourceHandler("/images/**").addResourceLocations("/WEB-INF/views/images/");
}
}
|
运行,
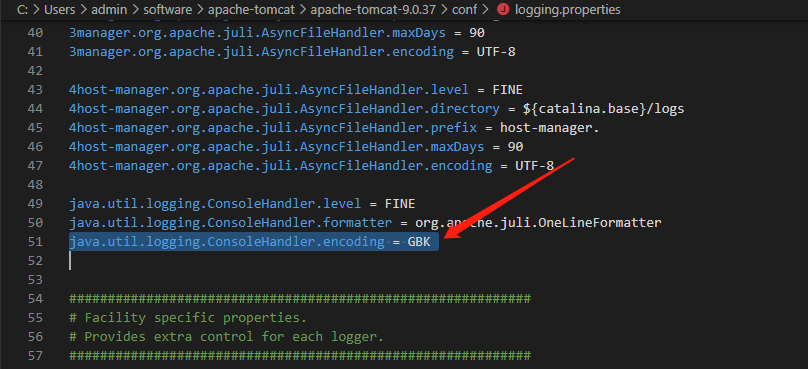
坑点:
tomcat控制台乱码问题:修改tomcat的/conf目录的logging.properties下图中指示位置为GBK。
报错严重 [RMI TCP Connection(3)-127.0.0.1] org.apache.tomcat.util.modeler.BaseModelMBean.invoke Exception
- 地址忘了加“/”
- 你的业务处理层Servlet注解
- 你使用web.xml写的url-pattern
- 你编译过项目后生成了target文件夹(存放你的项目字节码文件),你又修改了项目某文件名或类名,重启Tomcat就会发生这种情况。删除target文件夹,在重启Tomcat即可。
(我的情况,自己修改了个实体类名称,导致类加载无法找到)
参考
参考:
IntelliJ IDEA 搭建SpringMVC并用MAVEN配置
IntelliJ IDEA上创建Maven Spring MVC项目
【从无到有】IDEA + maven + java web + springMVC + Tomcat 项目搭建